How to measure locally corrected intensities
This guide shows you how to correct single-cell intensity measurements by subtracting or dividing by the local background around each cell.
Reference keys: local correction, single-cell measurement
Prerequisite: You must have segmented the cells. Tracking is recommended but not required.
Enable local background correction
Open the Measure tab for your population of interest.
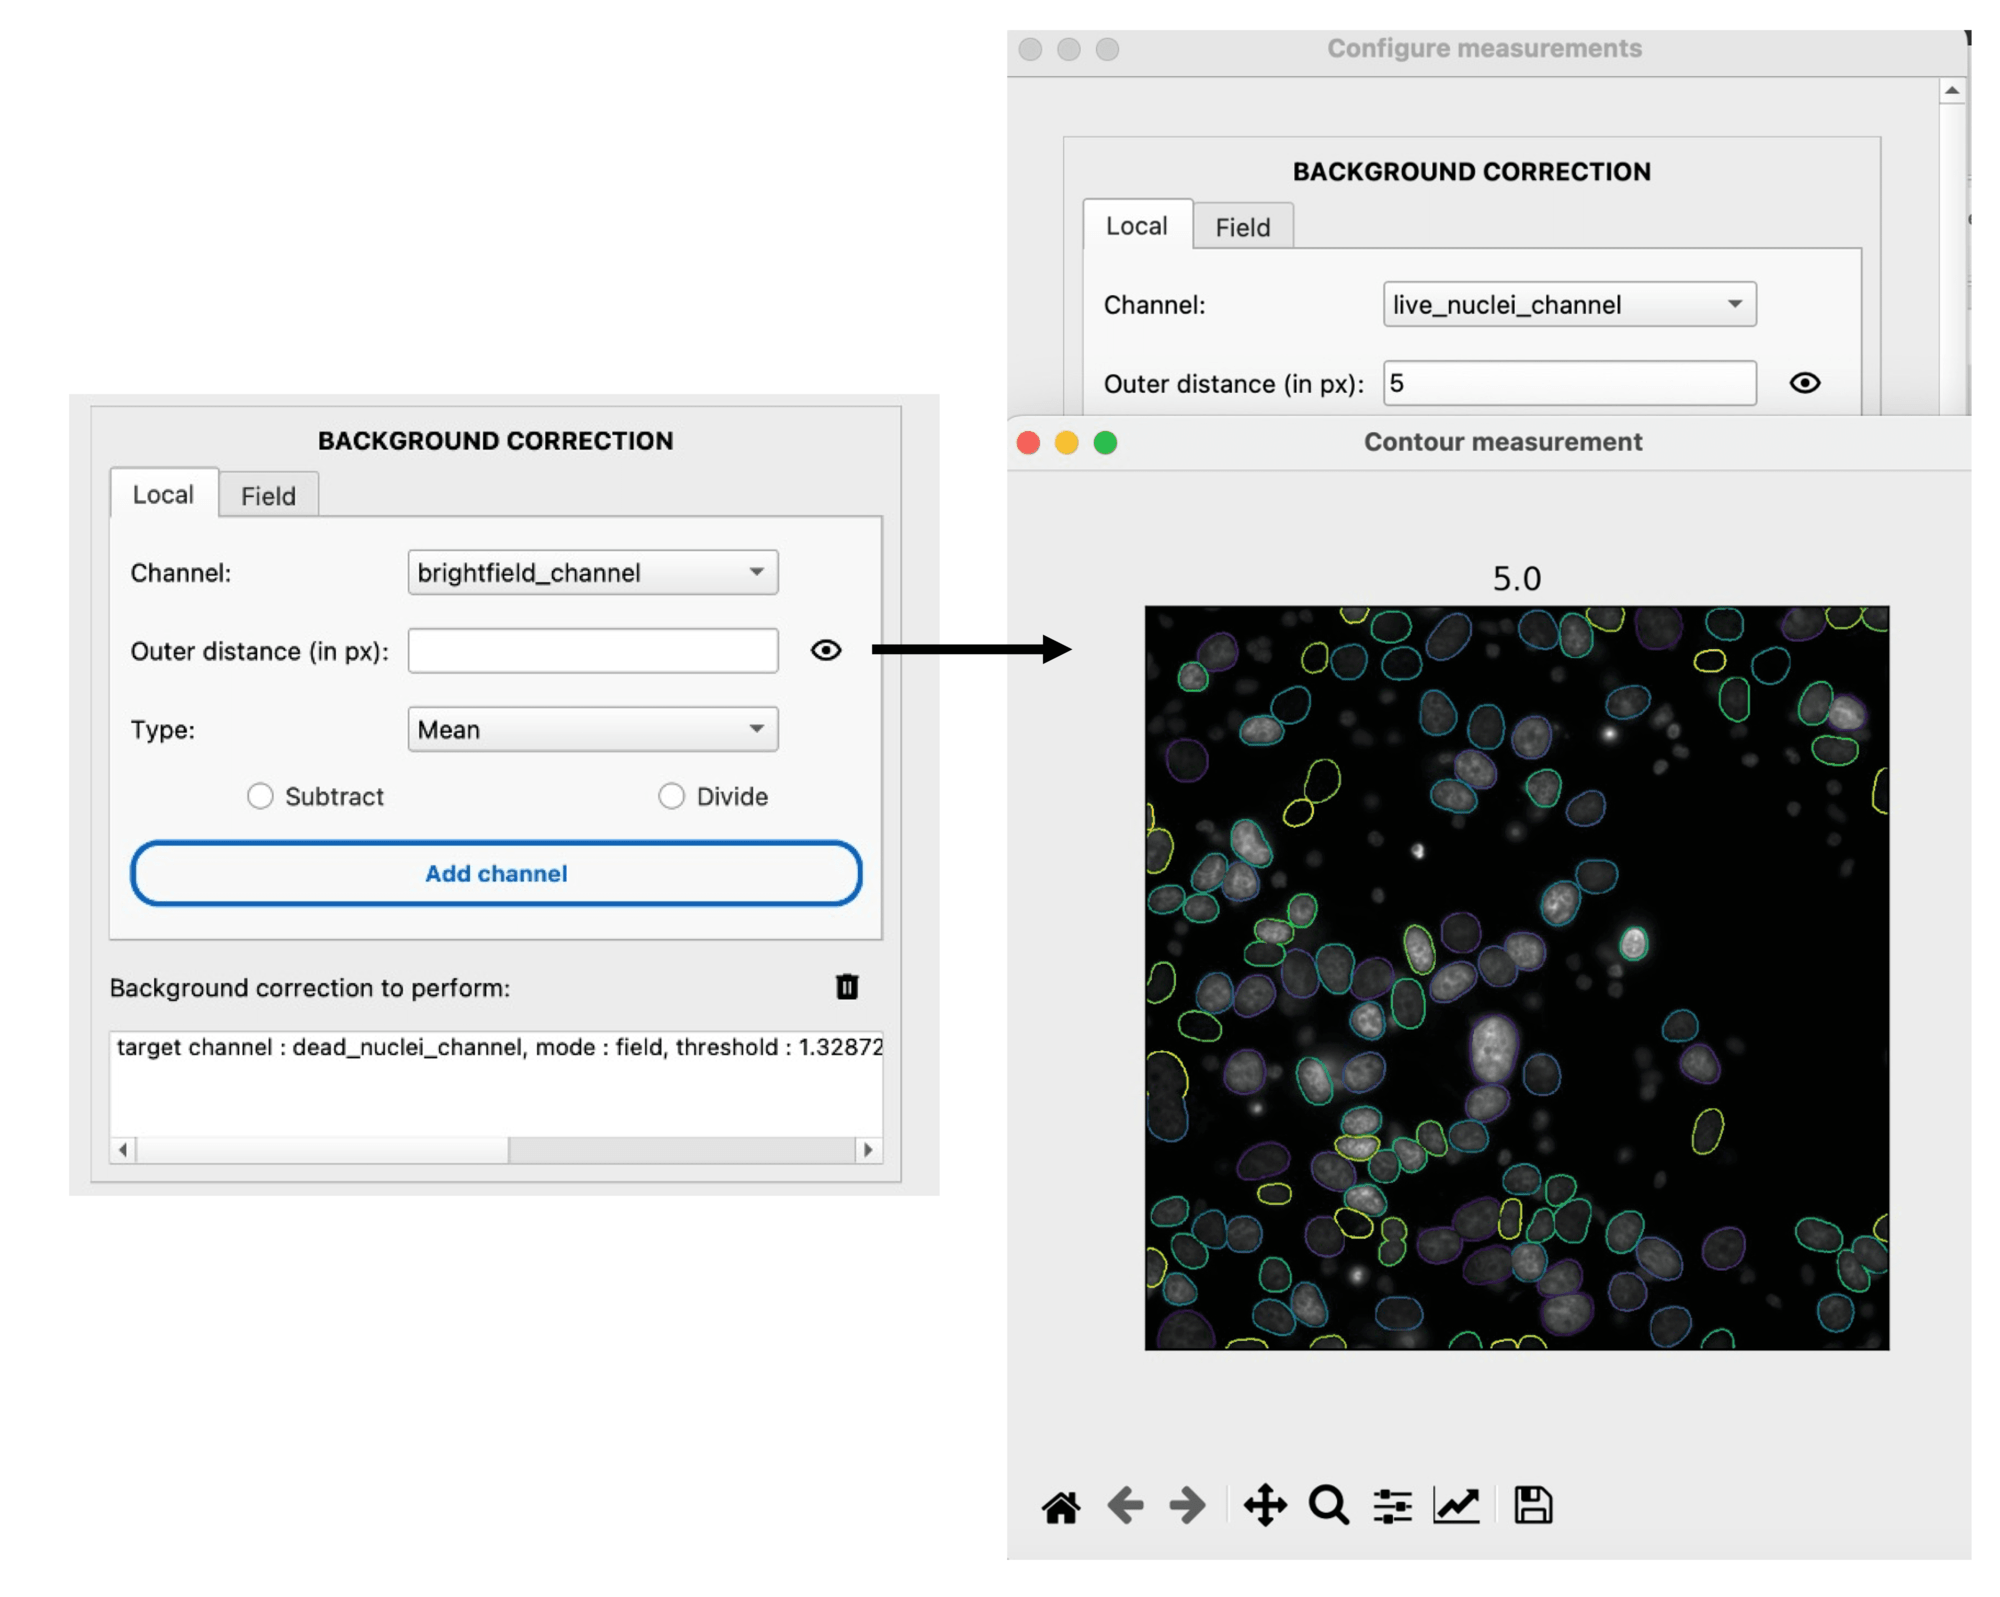
In the measurement settings, locate the Background correction section.
Select the Local mode.
Configure the correction
Channel: Select the intensity channel to correct.
Distance: Set the distance (in pixels) from the cell mask edge to define the background ROI. The background is sampled in a ring around each cell at this distance.
Estimation method: Choose how to estimate the background intensity within the ROI:
Mean: average intensity in the background ring.
Median: median intensity (more robust to outliers).
Correction method: Choose how to apply the correction:
Subtract: subtract the estimated background from the cell intensity.
Divide: divide the cell intensity by the estimated background.
(Optional) Click the eye icon to open the background ROI visualizer and verify the ring placement around your cells.
Run the measurements
Click Set to save the configuration.
In the control panel, check the MEASURE box and click Submit.
The corrected intensity values will be appended to your measurement table with a suffix indicating the correction method and distance.
Tip
Use the ROI visualizer to ensure the background ring does not overlap with neighboring cells. Increase the distance if cells are densely packed.